Prototyping Galore

Last week was a busy one filled with prototyping! First, we tackled building the stand itself along with a mechanism to rotate the light upwards, and decided to address the challenge of locking the light in the upward position after we had conquered the first two goals.

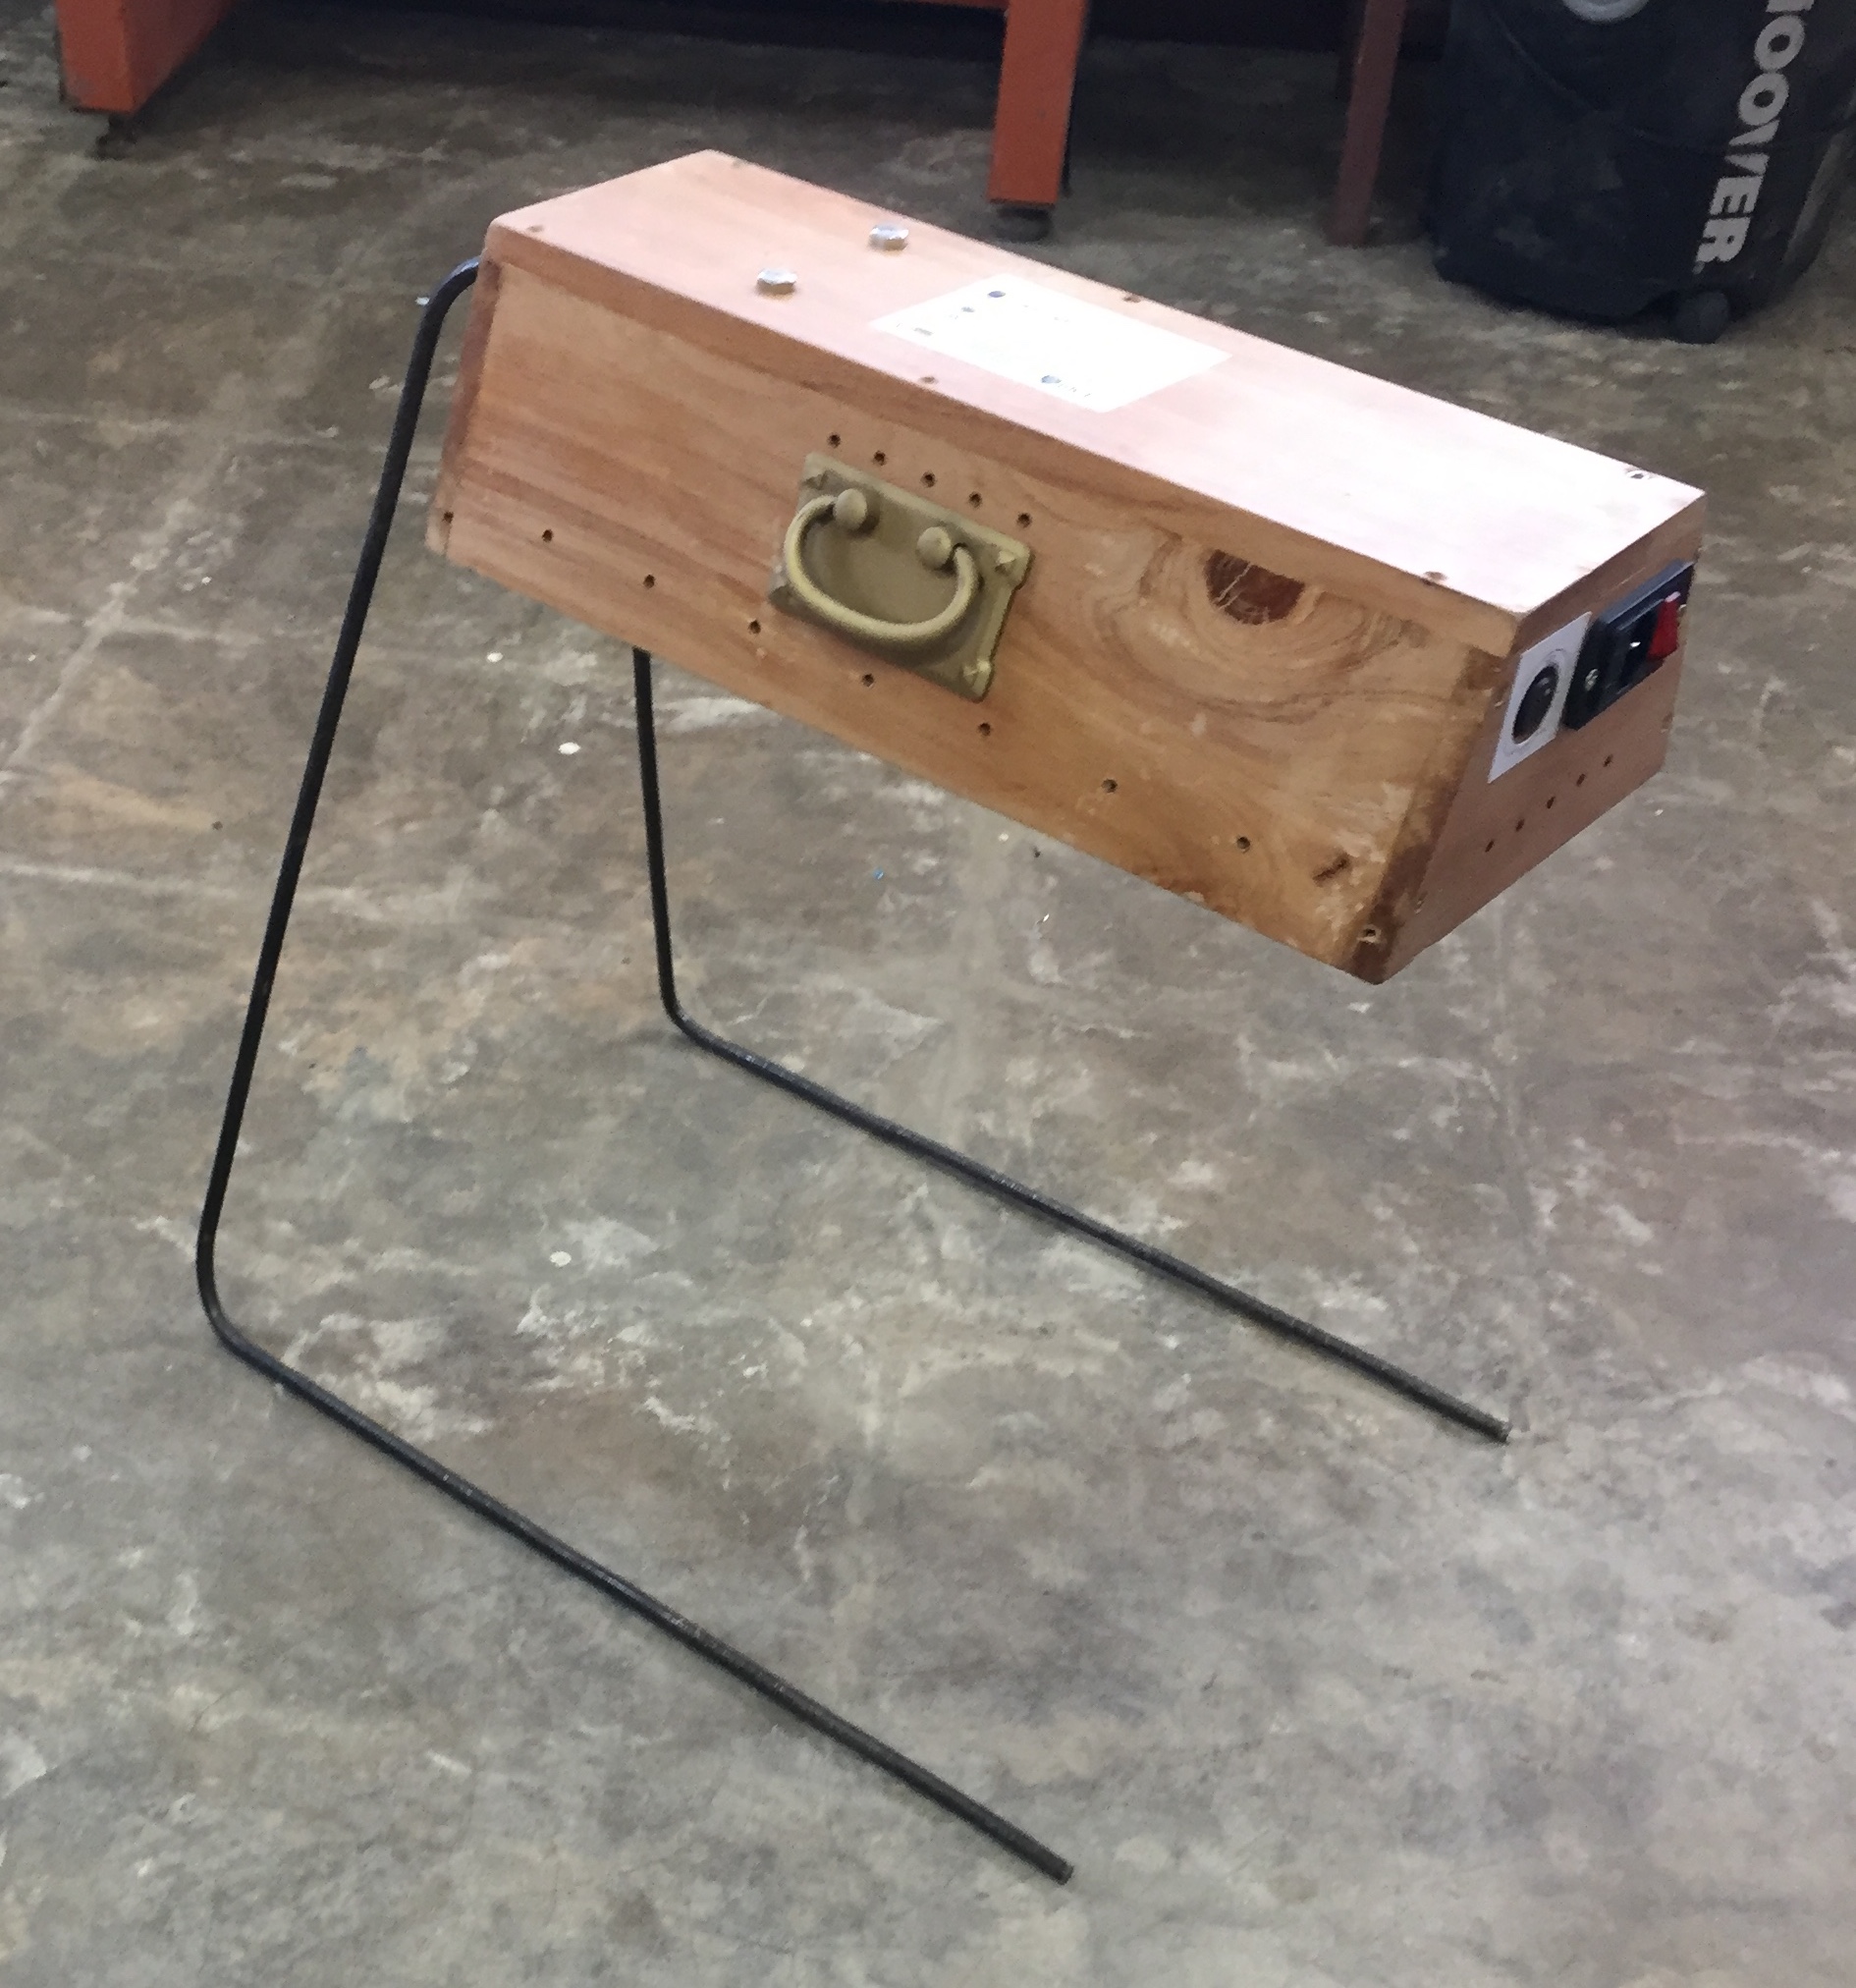
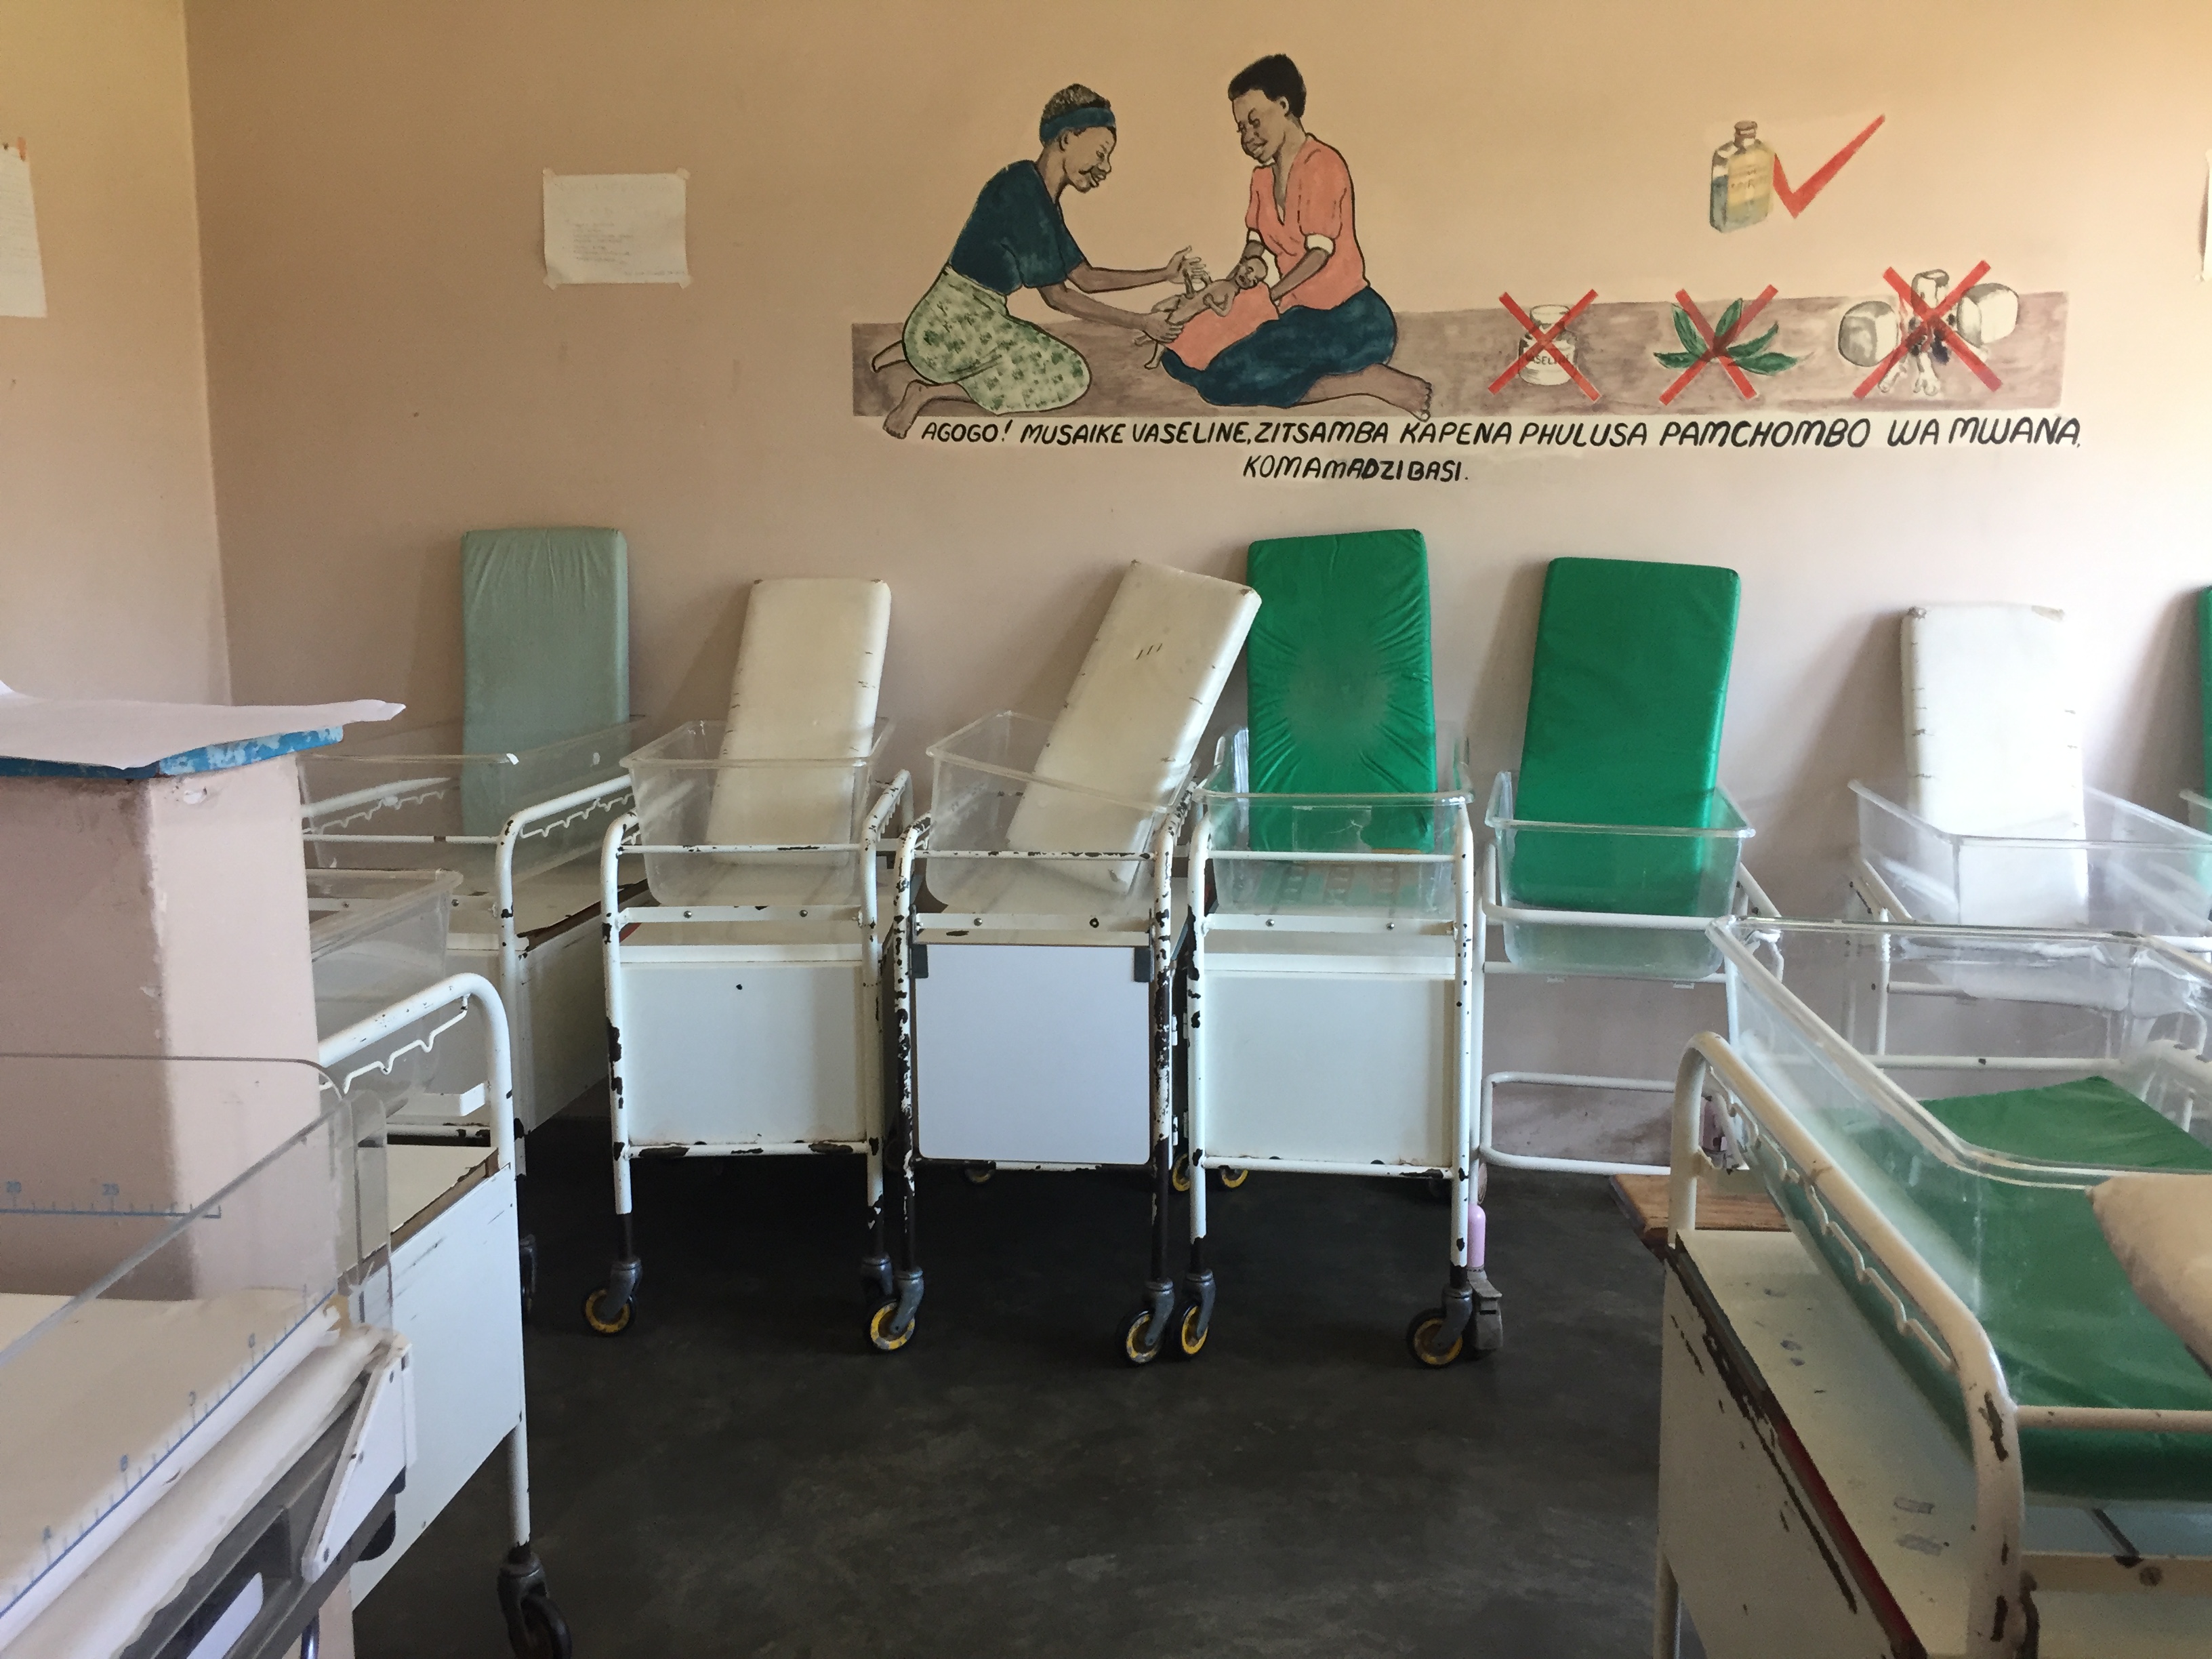
For the stand, we decided to maintain the rebar base from the initial prototype that we showed in hospitals because it is durable, flat enough to fit under a baby’s mattress, and the shape can be easily modified by squeezing or pulling the metal legs of the stand. In the previous prototype, the rebar actually looped inside of the light and was held in place internally. To make the light able to rotate, we externalized the rebar stand from the light completely by sandwiching the bar that was inside the light between two blocks of wood. The light was then connected to the wooden blocks with a hinge.

Chikondi bending the rebar into shape. We ended up making a shaping mold out of wood to keep the angles uniform across stands
First prototype in the neutral position.
Hinge action!

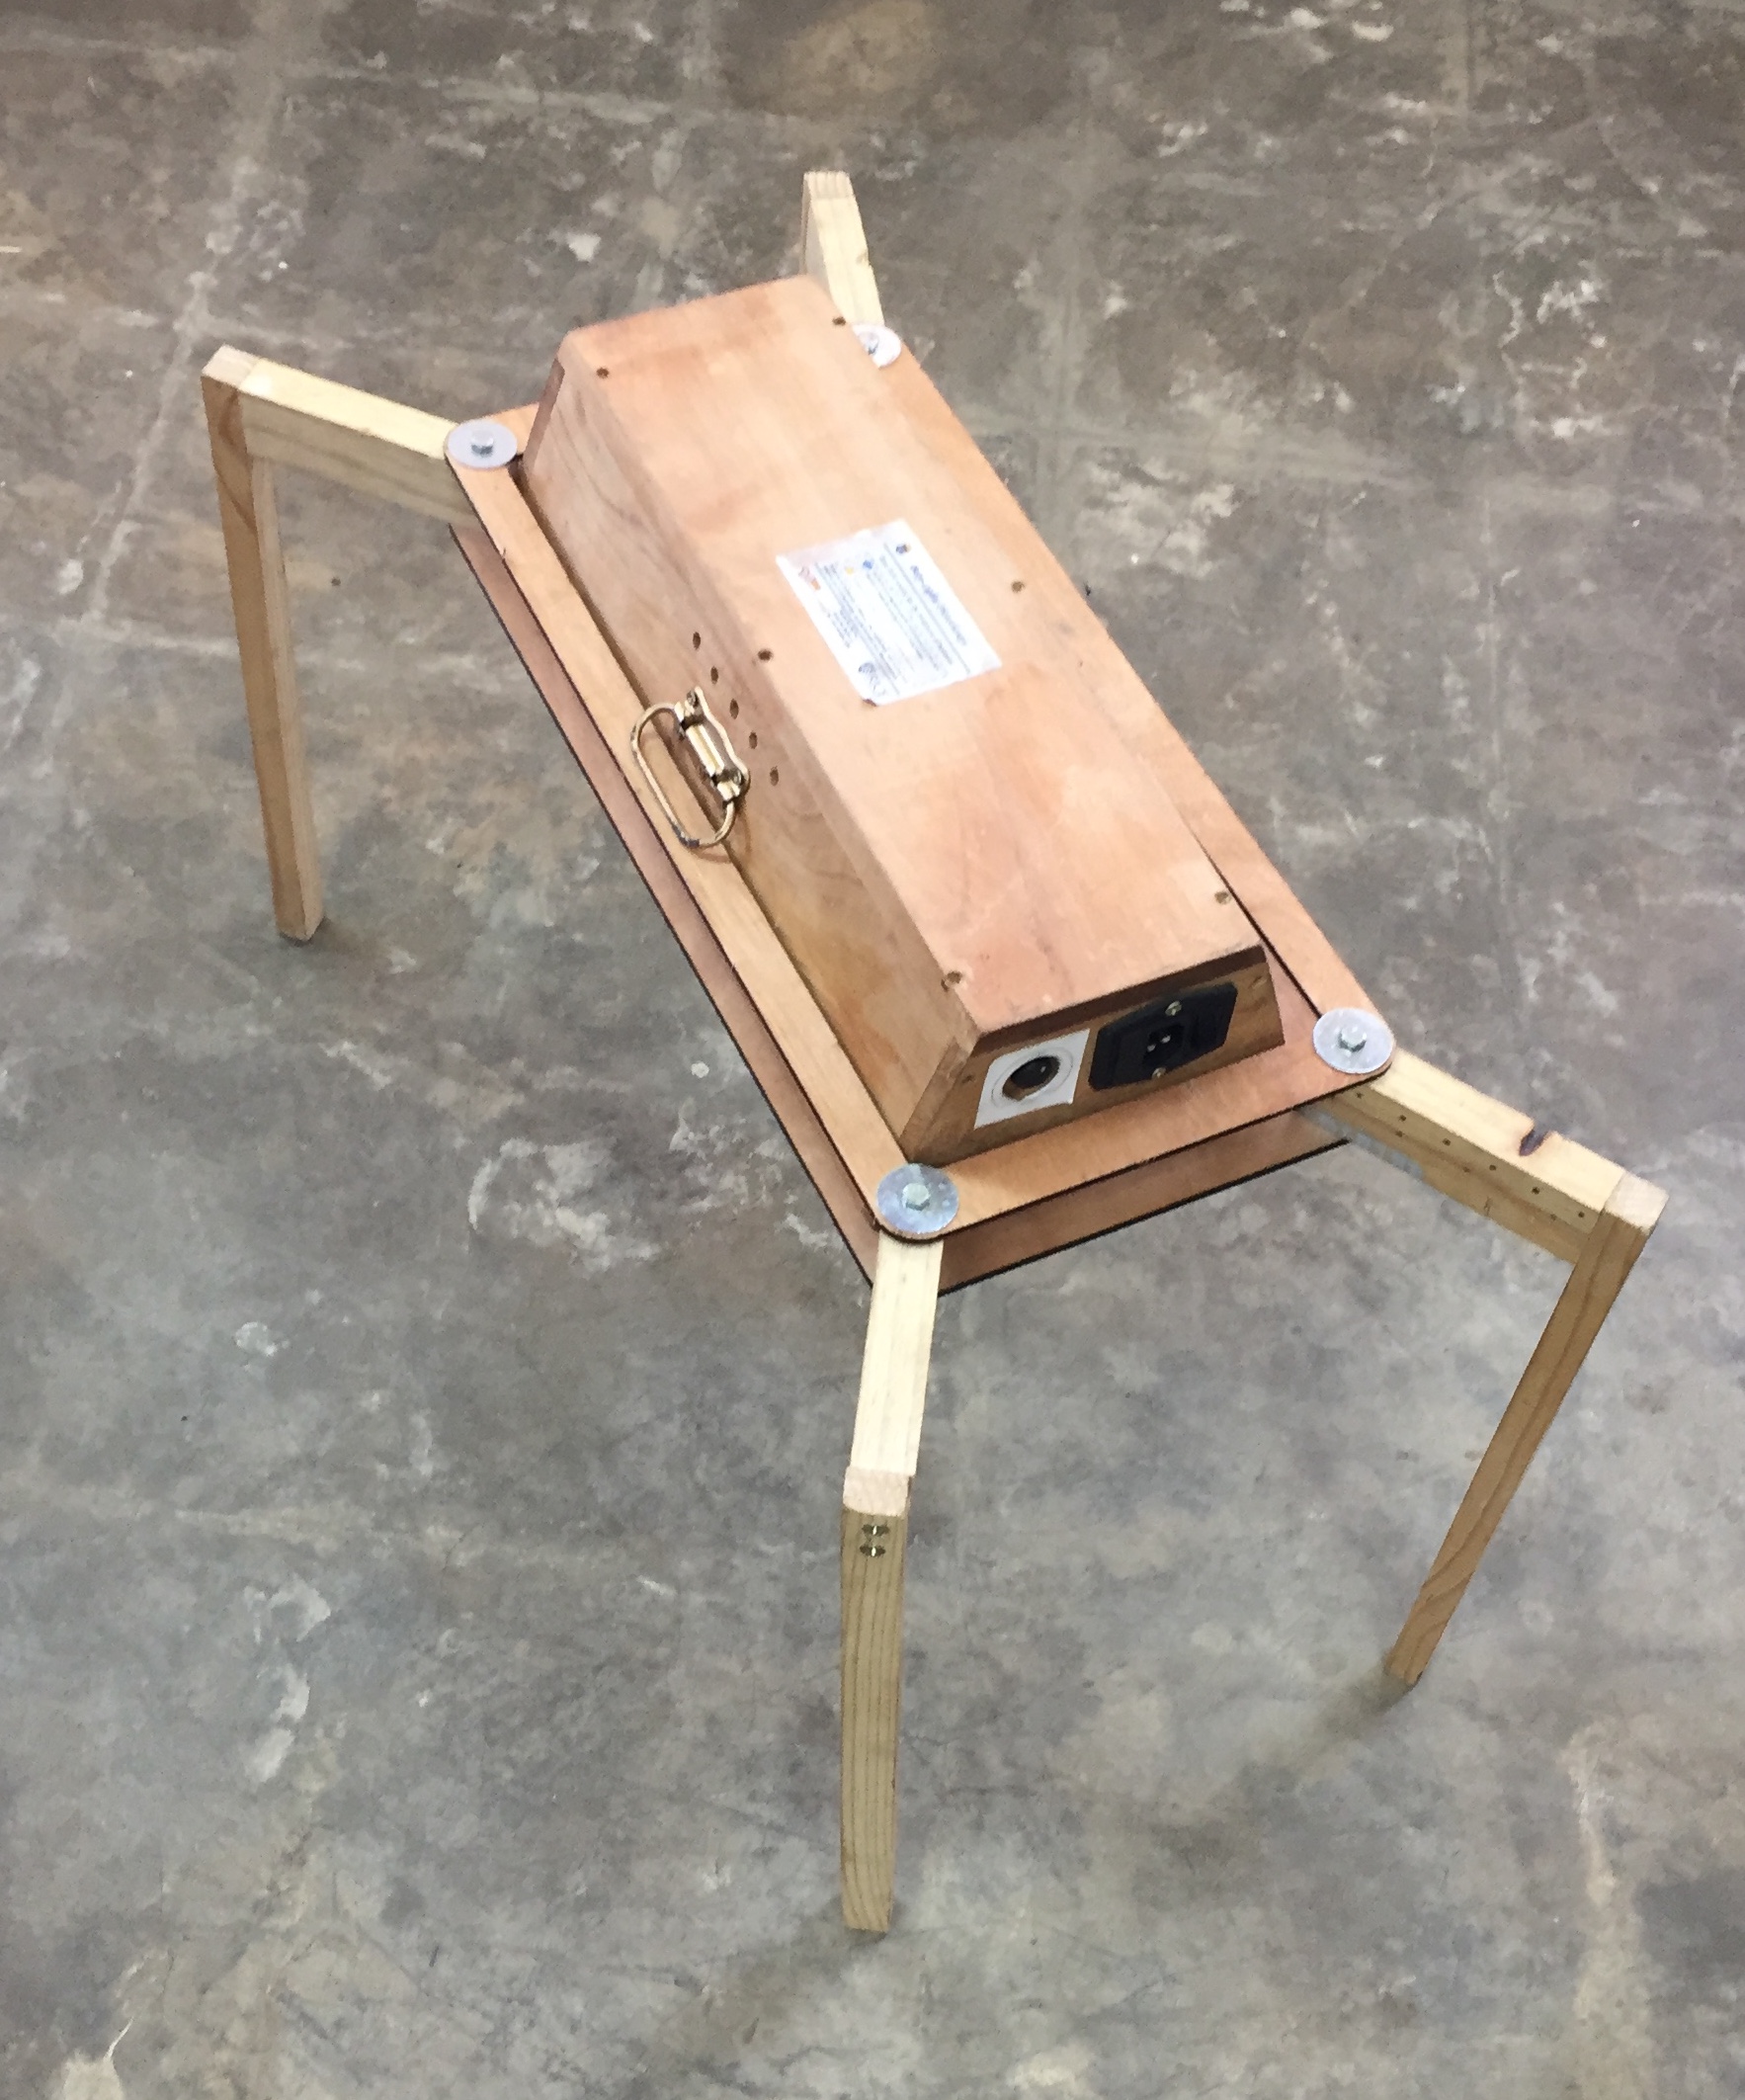
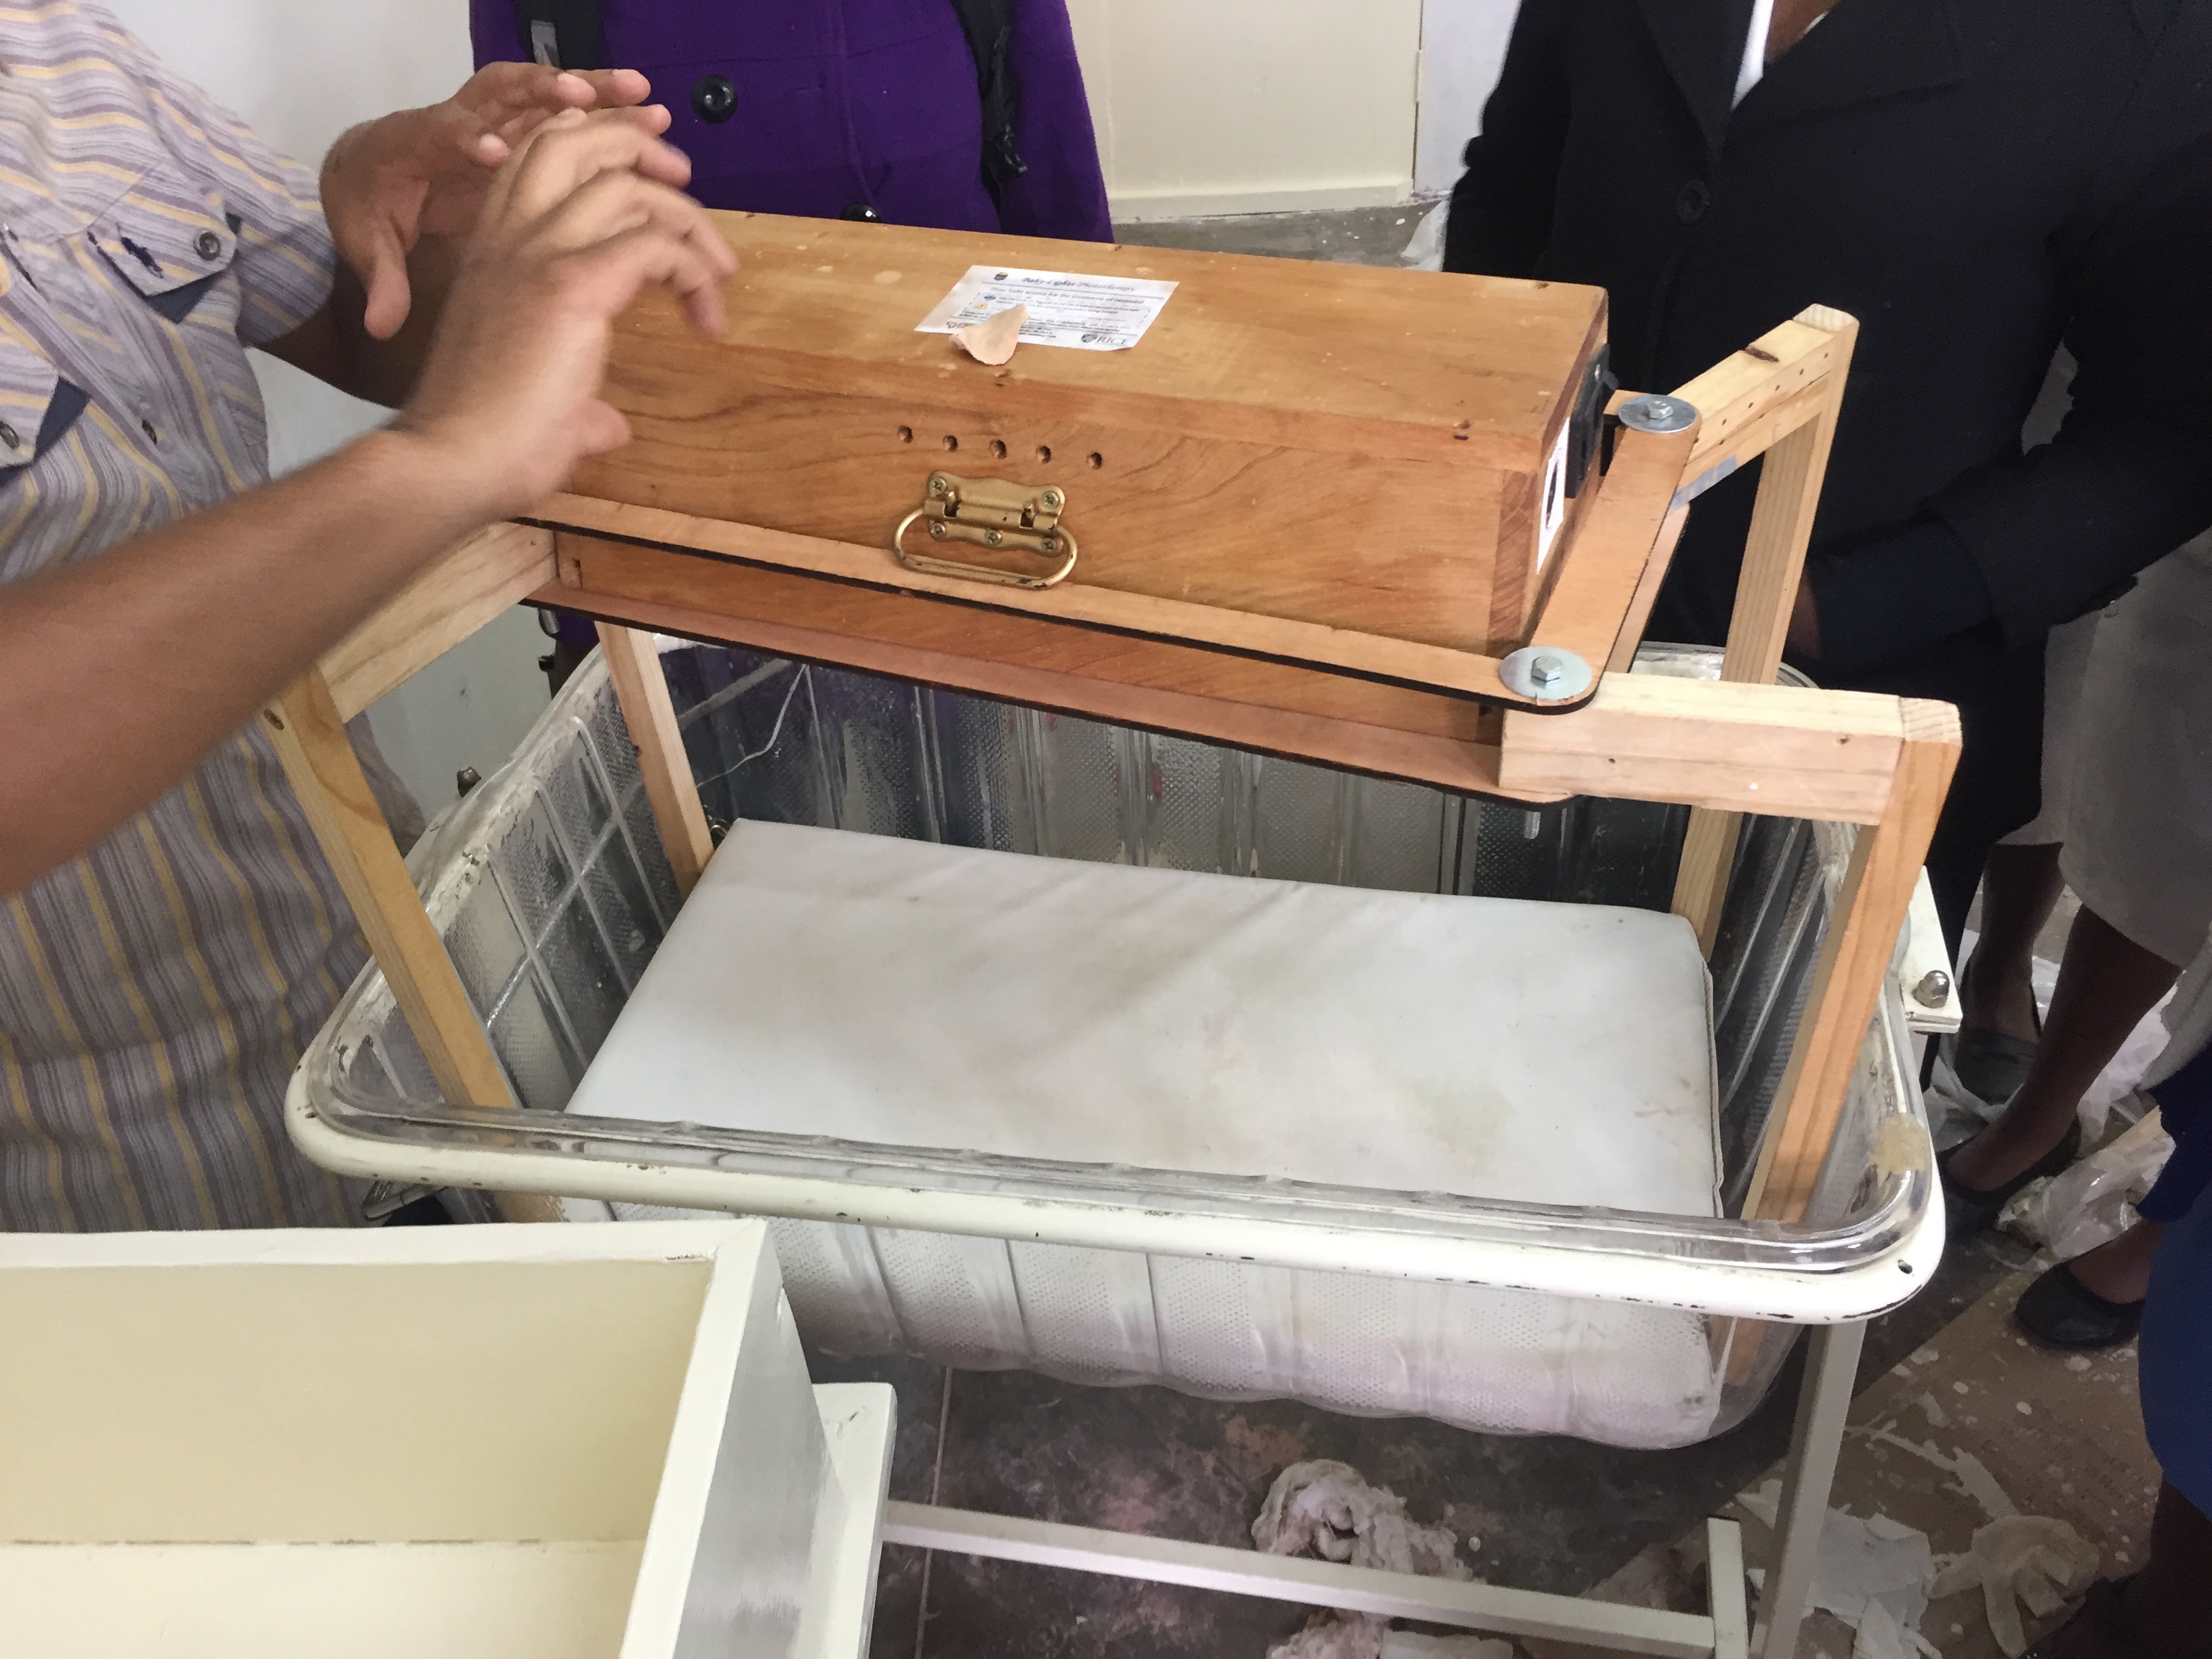
We soon realized that this method took up too much precious real estate over the baby’s bed, offsetting the light from being centered over the baby and rendering it less effective. To combat this, we shifted the horizontal wood/metal sandwich to a vertical position. This solved the space problem, but we found that the stability of squeezing rebar between two blocks of wood wasn’t the best. To address this, we cut a groove out of the wooden blocks using a CNC milling machine and bolted the two blocks together around the rebar that fit snuggly in the grooves.

The CNC mill cuts a very clean groove in the wooden blocks
I had to learn AutoCAD Inventor to develop the design for the groove, but it is very similar to SolidWorks, so it wasn’t too difficult


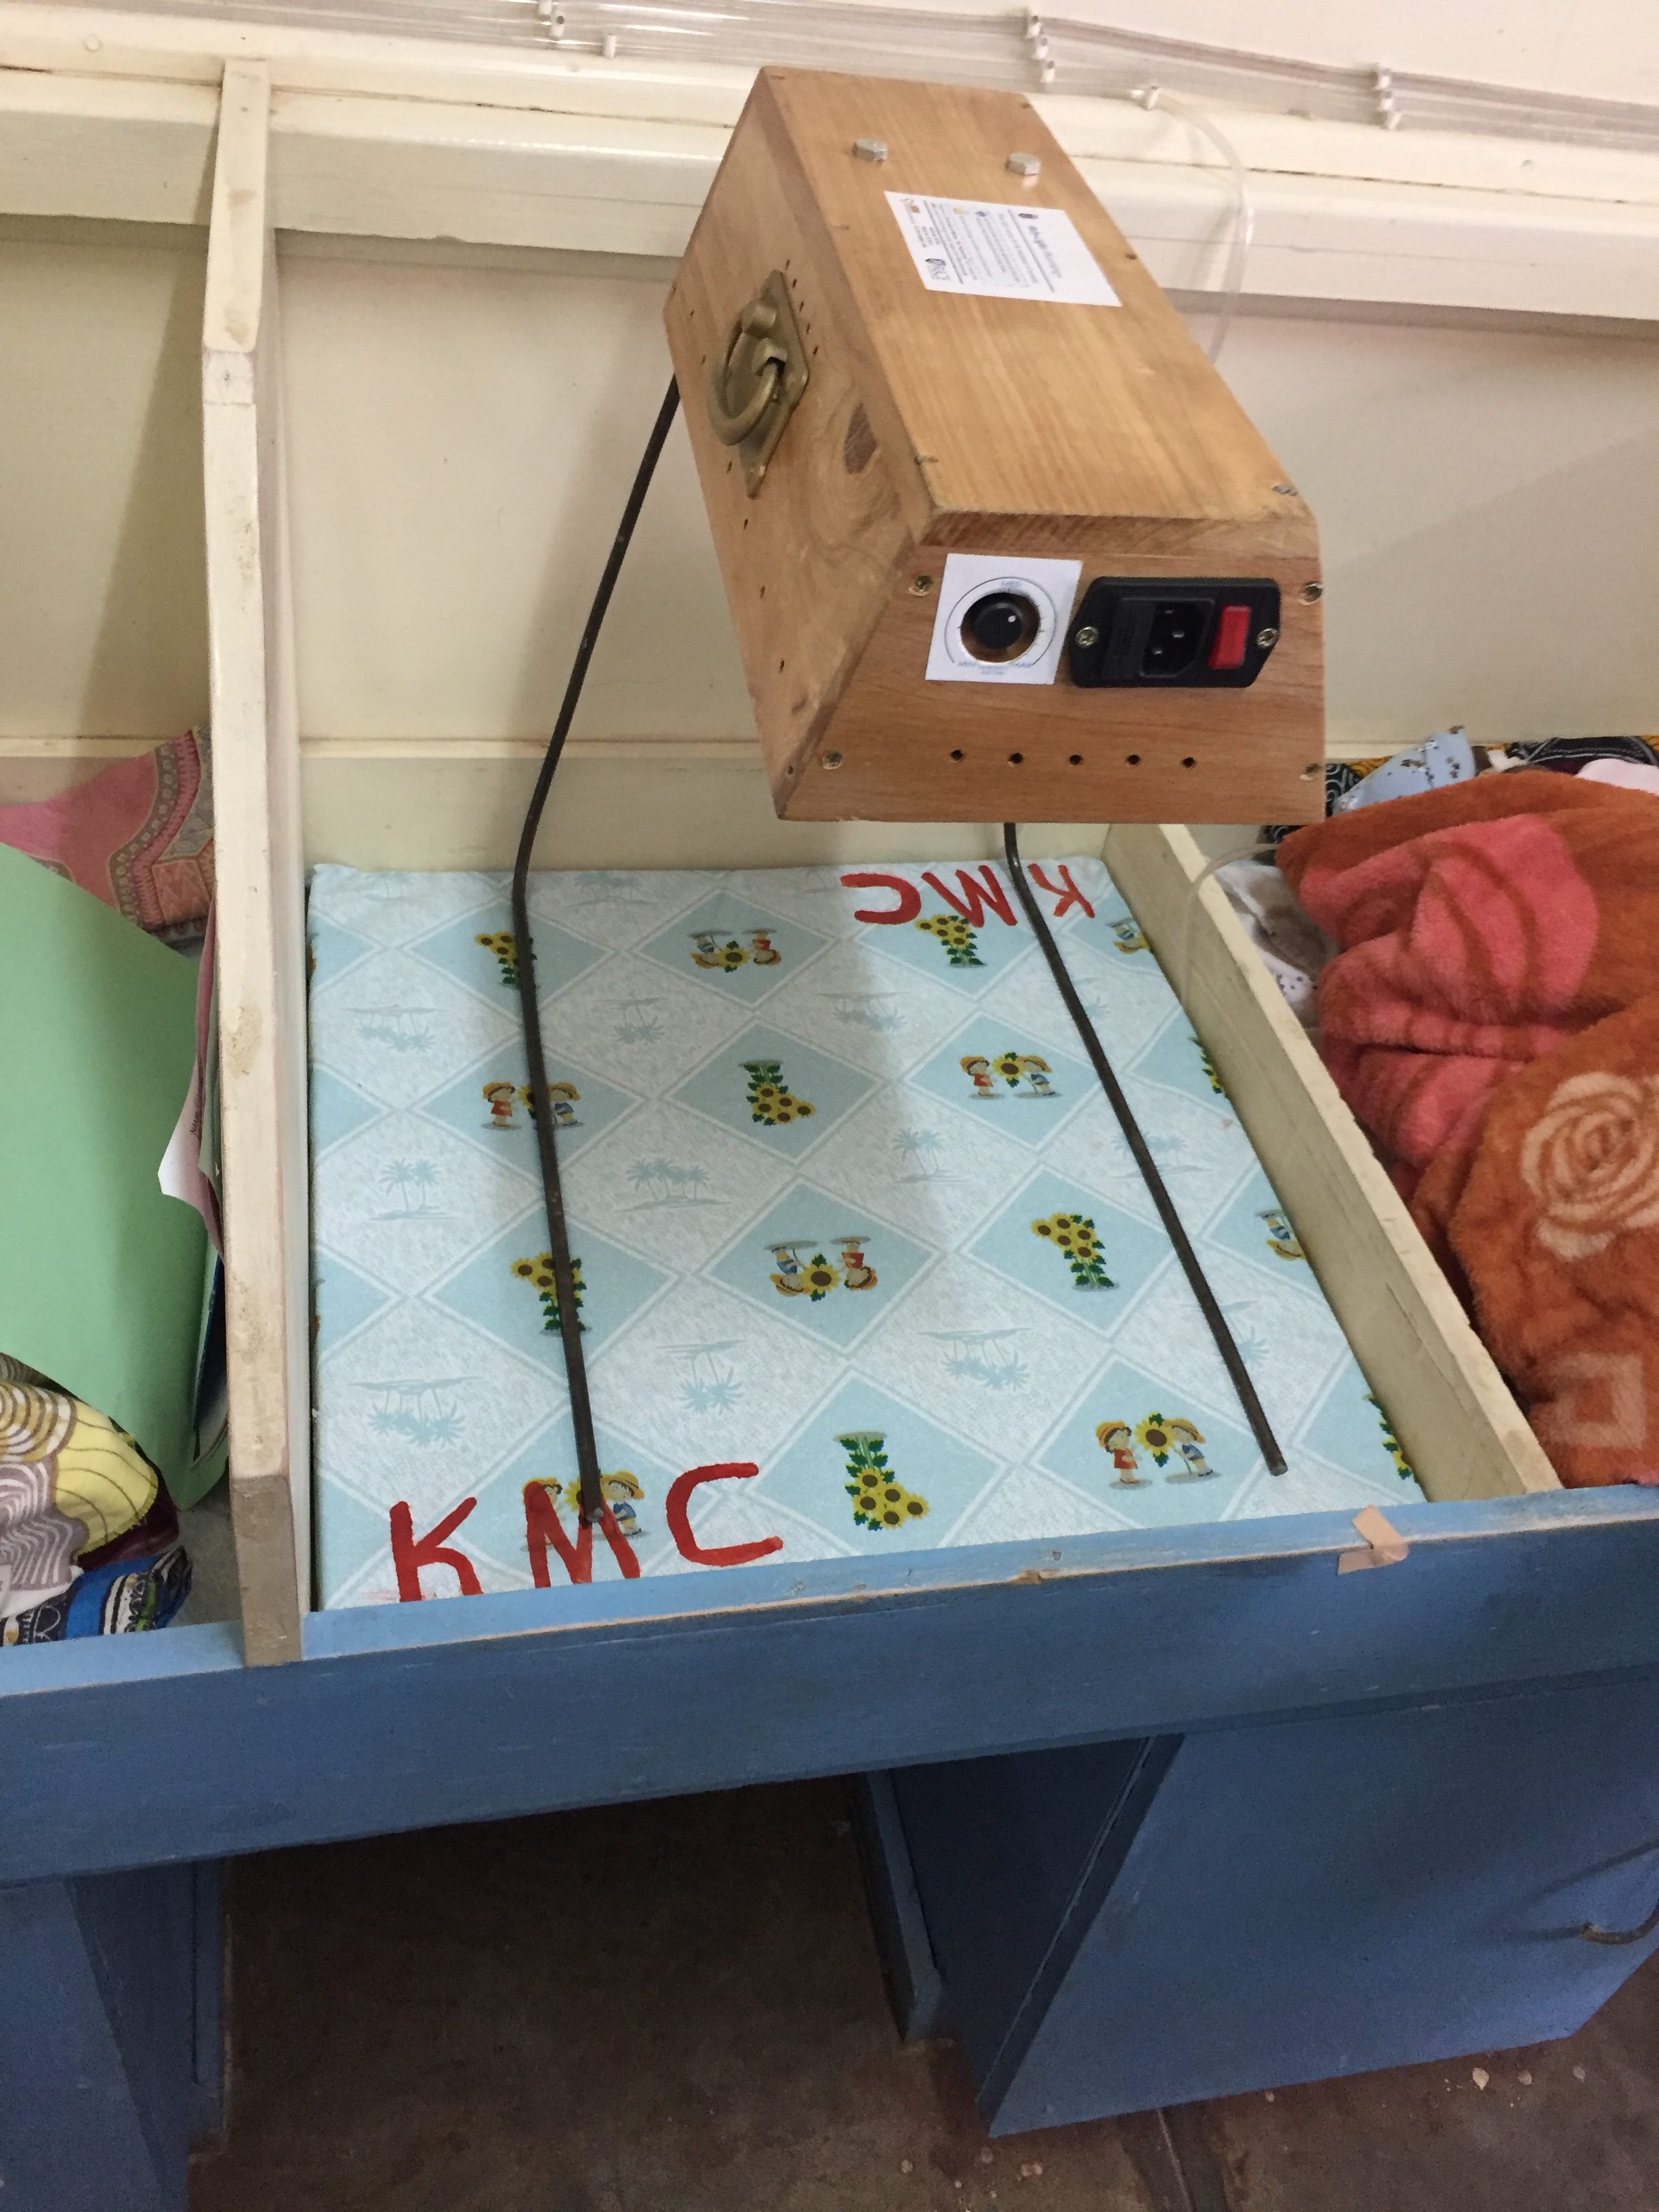
On Thursday, we worked on producing several stands to give to training hospitals for use. Although they were not completely at the point we wanted them to be at (we still had no mechanism to hold the light up in the rotated position), we were able to make slight modifications so that we could at least give them a few stands that previewed what was to come.

Our first prototype in a training hospital
Switched on


Besides lots of iterative prototyping, this week was also filled with independence celebrations! Tuesday was American Independence Day. We were all missing home a little, so we decided to have our very own barbecue! We grilled burgers on a braii stand (charcoal grill), found “American Style Fries” at the store, and listened to patriotic music. Although we didn’t have fireworks, we lit candles and used our imagination.

Thursday was Malawian Independence Day, but we opted to work Thursday so we could take Friday off and spend a long weekend at the lake! It was a lovely and relaxing time — we read on the beach, snorkeled, swam, and explored the local town.

Lake Malawi is gorgeous!
Go Owls!


-S

Let the Brainstorming Begin!

After introductions, tutorials, and traveling for the first two weeks, the third week really marked the beginning of our getting to work on our project. As a refresher, Chikondi and I are tasked with designing a stand for the Bililight phototherapy device that can be used in a variety of cribs, cots, and beds. We took all of the feedback from our hospital visits and brainstormed lots of ideas for different types of stands (shoutout to my Freshman Engineering Design class for teaching me how to effectively use the brainstorming/screening/scoring process!).
Some of the feedback that we took into consideration was the desire for the light to be able to move out of the way from overtop of the bed so the nurse can access the baby easier. We came up with mechanisms for swiveling the light sideways, but realized that this would change the center of mass of the device and possibly throw the stand off balance. The ideas we came up with for swinging the light up or completely wheeling the entire stand away seemed more viable.

A pile of our 75+ brainstormed ideas

On Tuesday, we were able to visit the nursery at Queen Elizabeth Central Hospital here in Blantyre to see how they use the Bililight currently. When they use it with a radiant warmer, the light is placed on a metal, 3-sided stand and when it is used with a wooden incubator (called the Hot-Cot) it is simply placed atop a plexiglass cover. They like the metal stand, although it can hinder access to the baby at times. They are concerned with using the bililight with the Hot Cot as their current method puts the light too close to the baby. After this visit, we tried to take these two new types of beds into consideration as we screened our brainstormed ideas.

The bililight being used with a radiant warmer
The bililight being used on the Hot Cot incubator at Queen Elizabeth Central Hospital

This week also included a hardware store adventure in which we visited at least 10 different hardware stores around the Blantyre area searching for different types of hinges and bearings and any other things that could be useful for creating more space above the bed for access. It was really interesting to see different types of hardware stores. One we visited seemed like a standard hardware store you would find in the US, like a smaller Home Depot. Most others were quite different — there was a small front room with a counter and some products on display on the walls, but you had to tell the employee at the counter what you were looking for and they would go back in their store rooms to bring you products. Overall, our shopping trip was not as successful as we would have liked and we only managed to find a few different types of hinges.

A typical hardware store
The inside of a hardware store


We built a low fidelity prototype that incorporates a hinge to swing the light upwards. We are now deciding between 3 different mechanisms to hold the light in the upward position. One uses a gate latch, one employs a similar mechanism to a reclining pool lounge chair with a bar that rests on notches, and another uses a pull-able knob that locks into place in an upward or horizontal position. Now that we have a low fidelity prototype built, we can visualize which method will be safe, effective and most feasible to produce here in Malawi.

A low fidelity prototype to test a hinge and visualize dimensions


-S

3. On The Road

At the end of last week, we received our project assignments for the internship. Our group of 12 was split into 6 pairs, and each was assigned a different challenge related to medial technologies. The projects are all pretty unique — some have to do with compressors in oxygen concentrators, some with a software interface, and some with improving Rice-developed technologies.

Chikondi and I are working to design and manufacture stands for a low-cost phototherapy light that is used to treat babies with jaundice. Phototherapy lights exist across the world, but often times are expensive and not accessible for hospitals like those in Malawi. The Bililight (the wooden box in the pictures below) is a low cost phototherapy device that came out of Rice 360 several years ago. The problem is, the light does not have a stand — it is currently being held up by tying it to a walking stick with cloth strips, or placing on top of the cot, too close to the baby. Chikondi and I were tasked with building a stand for these lights that is easy to use, safe, and maintains the intended function of the light. Two initial prototypes have already been built, but we plan to improve upon them or come up with a new design altogether.

This prototype has two metal legs that extend down and under the bililight. It’s slightly unsteady but compatible with different beds.
This prototype has 4 wooden legs that can each swivel, to make the entire stand adjustable to fit in different beds.


We spent all of last week collecting information. First, we read through documentation and papers to learn as much as we could about jaundice, phototherapy, and the bililight. We spent Tuesday, Wednesday, and Thursday traveling to different hospitals around southern Malawi taking some initial prototypes for feedback and gathering other information. Here’s what we learned:

  • Nurses generally preferred the metal two-legged stand over the wooden four-legged stand
  • There were many types of cots, and the metal stands generally fit most sizes, while the wooden one did not fit in the plastic cots
  • Many nurses requested that the bililight be able to be swiveled out of the way so they could access the baby easier
  • Nurses wished for the stand and light to be stored as one unit, so they wouldn’t risk losing parts
  • Some want the stand to be on wheels, and some want it to be able to be picked up
The metal stand in a wooden cot at Thyolo Hospital
The wooden stand doesn’t fit very well in the plastic cots


It was really interesting visiting different hospitals in different places in the country. All hospitals are one story, and are a series of wards connected by covered walkways that are open to the outside air. The district hospitals (the smaller, regional ones) seemed to generally have nicer facilities, but often times the equipment and staffing was better at the larger central hospitals. The adult wards had many beds (about 50 in some hospitals) all in the same room, and the nurseries varied in size.

The nursery at Zomba Central Hospital (they have plastic cots)
The nursery at Mulanje District Hospital (note the phototherapy device on the left (under the cloth), the oxygen flow meters in the center, and the space heater on the right)


We also had a lot of fun traveling with each other, and enjoyed driving around cities like Zomba, stopping to take pictures at a tea plantation, buying a giant papaya from the side of the road, driving up a winding mountain road, and just spending time together!

Vin showing off the Mandasi we bought for the road. It’s sort of like a less sugary donut and it’s SO GOOD and pretty cheap (about 60 Kwacha, or 8 cents per mandasi)
Having fun taking photos at Ku Chawe hotel on top of a mountain in Zomba


Next up, we are going to take this feedback into consideration and brainstorm ideas for a new and improved stand. This is one of my favorite parts of the engineering design process, so I can’t wait!

-S

2. Introductions

Wow, how time has flown! Week one is already over and I could not be more excited for what the next 6 weeks have in store! We have been very busy and this first week has been filled with introductions — to fellow interns, to resources at the Polytechnic, to technologies, and to a new culture.

I get up a little early to watch the sunrise over the mountains as I eat breakfast every morning

Meeting our fellow interns, Malawian students from the Polytechnic, was an experience I had been looking forward to for a while. We went around and did the standard “about me” introductions on the first day, but I have come to know so much more about each of my new colleagues (or friends, rather) just by spending our days together. We are a diverse group— some from Lilongwe, Blantyre, or New Jersey, some mechanical, electrical or biomedical engineers — but I can already tell we are going to be a tight knit group, and these diverse perspectives are only going to strengthen our design.

Along with getting to know students at the Polytechnic, we also got to know the resources available in the Polytechnic’s Design Studio. The equipment is actually not too dissimilar from Rice’s Design Kitchen — there is a laser cutter, 3D printers, a soldering station, and a plethora of tools. We were able to practice using all of these resources, as they might come in handy in our projects that we will be working on this summer. We also received introductions to arduinos, something that I have been only briefly exposed to in the past, so I was eager to learn everything I could. We first used the arduino to illuminate an LED, which served as a gentle introduction to programming it (using java or C++ syntax), and then moved on to using it to build different types of sensors, such as an air pressure sensor.


Using an arduino to illuminate a LED

The introductions continued as we got the crash course on several devices we will be working with this summer — oxygen concentrators, infant radiant warmers, and Rice’s very own Pumani bCPAP. We were able to dissect and inspect each of these devices as we discussed each part and its functionality, along with common problems with the device and methods of troubleshooting. I especially enjoyed poking around the inside of the oxygen concentrator. It was neat to see a compressor, something I have worked with on a theoretical level for the past semester in my thermodynamics class, actually functioning in a device relevant to my interests.

Dissecting an oxygen concentrator with the other interns

Lastly, above all, this week has been an introduction and adjustment to, and appreciation for the Malawian culture. The people are beyond friendly (even to an obvious foreigner), the food is very tasty (and the portions are huge), and the music makes you want to stop whatever you’re doing and dance. In the coming weeks, I’ll be writing a few blog posts that focus more on my cultural experiences, along with more about what we are doing at the design studio. Next week we will be traveling to different hospitals around southern Malawi to get some feedback and search for opportunities for improvement. I can’t wait to see more of this beautiful country!

That’s all for now — more to come soon.

-S

1. Lists

The big day is almost here— I’ll be flying out for Malawi on Thursday to begin my adventure as a Rice 360 Intern! My four fellow interns and I spent the first two weeks of May preparing technologies and duplicating prototypes, but I have been able to spend some time at home for the past few weeks.

Besides eating lots of tacos and mourning the Spurs’ loss in the NBA playoffs, I have been spending a lot of my time prepping and packing for my trip. My packing list has been as valuable for me as my online calendar is for me during the height of the school year. I’ve always been a fan of lists — growing up, I used to leave myself to-do lists or reminder lists on little sticky notes in random places around my house. In the same spirit, my first blog post of the summer is a compilation of lists. Please enjoy!

My Packing List

Cities I’m Traveling Through

  1. San Antonio
  2. Houston
  3. London (12 hour layover!)
  4. Johannesburg
  5. Blantyre (home!)

Books I’m Bringing:

(All 5 of us interns are bringing several books to share)

  1. The Giver
  2. Kite Runner
  3. The Witches
  4. Autobiography of Malcom X
  5. 2001: A Space Odyssey

Responsibilities While in Malawi

  1. Introducing Rice devices — We will take healthcare technologies and devices that have been developed by Rice students and seek feedback from doctors and nurses.
  2. Needs-finding — We will search for potential healthcare obstacles that could be solved by future Rice design projects.
  3. Developing new technologies — We’ll choose a project and get to work!
  4. Bonus: working alongside Malawian students and immersing ourselves in a beautiful new culture!

Devices We are Taking

(all developed by Rice students, #3 and #7 by yours truly)

  1. “Breast Test” Breast Cancer Detection Training Model: A low cost model of cancerous and noncancerous breasts that present several different tumors and abnormalities.
  1. Anti-Fog Surgery Eyeware: A tube of silica pellets that can be placed inside surgery eyeware to absorb moisture in humid operating rooms
  1. Insulin Syringe Dosing Clips: A set of 3D printed clips that assist vision-impaired or innumerate diabetic patients in taking up the correct amount of insulin in a syringe.
  1. PneumaShoe Pneumatic Compression Device: A low-cost, over-the-foot Intermittent Pneumatic Compression Device, constructed with widely accessible materials and utilizing minimal mechanization, to prevent venous thromboembolism in low-resource settings.
  1. Ostomy Training Model: A model of a stoma that can be strapped to one’s abdomen to train patients due for ostomy surgery how to care for their stoma in the future.
  2. Ostomy Bags: A low cost and partially reusable double bag system for ostomy patients in low resource settings to use if they do not have access to traditional ostomy bags.
  1. Sterilization System for Kiwi Vacuum Assisted Delivery Device: A bucket-drainage system that prevents the Kiwi Vacuum Assisted Delivery Device from being submerged in sanitation chemicals for excessive amounts of time, preventing damage to the device and allowing it to be cleaned and reused.

    Insulin Dosing Clips

A Common Greeting in Chichewa

  1. Moni— Hello
  2. Muli bwanji? —How are you?
  3. Ndiri bwino, kaya inu? — I’m good, and you?
  4. Kaya inu, zikomo. — I’m good, thank you.

I can’t wait to get in the air and on my way! More to come soon.

-S